Monday, July 26, 2010

Windows-Classic Start Menu


 The first thing I did after XP installation was seek out ways to eliminate the garish colors and return the interface to a more soothing Windows 98 or 2000 scheme. The steps are detailed below.
Click on Start/Settings/Control Panel - Select “Taskbar and Start Menu”
The properties sheet shown below will open.
The focus is now on the “Taskbar Appearance” section.

If selected, “Lock the taskbar” keeps the taskbar locked at its current position on the desktop and prevents size and position changes of any toolbars displayed on the taskbar.
“Auto-hide the taskbar” keeps the taskbar hidden until you move the cursor to whatever edge of the screen you keep the taskbar anchored.
“Keep the taskbar on top of other windows” ensures it remains visible even when other windows are in full screen mode.
“Group similar taskbar buttons” is in my estimation one of the nicest features of XP. I switch between many documents when I work and this feature groups similar documents together rather than having them cluttering the taskbar with unreadable buttons. A highly recommended feature.
The “Show Quick Launch” section is the area to the left of the taskbar, right after the “Start” button, where you can place shortcuts to your most used programs. Used wisely, this small area can drastically reduce the need to use the “Start/Programs” series of mouse movements or keystrokes.
Switch your focus to the “Notification Area”
“Show the clock” is self-explanatory. I keep it checked so I know when it’s time for a Freecell fix.
“Hide inactive icons” is designed to keep the taskbar notification area to the far right of the taskbar free of inactive icons. I’m still not sure about this feature. Right now I have it disabled but will be going back to give it a try at some point.
Switch to the “Start Menu” tab.

The focus is now on the two “Start Menu” options available in XP

In this section there are two choices. The “Start Menu” which is the default for XP and the “Classic Start Menu” which is similar to the Win 98 and 2000 menus. If you like the XP look then “Start Menu” is your choice. If not, click “Classic Start Menu” and the “Customize Classic Start Menu” pictured below will open.
Under the “Start Menu” section you find the “Add” “Remove” “Advanced” and “Sort” options.
The “Add” option opens a wizard for selecting programs, creating folders, and naming the new items created for the start menu.
The “Remove” option allows you to select existing items on the start menu to be removed.
The “Advanced” option opens Windows Explorer to the section where the user settings are stored on the hard drive. Basically, you can accomplish the same tasks the “Add” and “Remove” options provide. This option does make it easy to group and organize items already present on the Start Menu.
“Sort” arranges the items on the Start Menu alphabetically, folders first, followed by any individual items not placed in folders.
Under “Advanced Start Menu Options” place checkmarks to activate/deactivate options.
The first three choices are display options for “Administrative Tools”, “Favorites”, and the “Run” menu. Select any you would like to have available from the Start Menu.
The next choice, “Enable Dragging and Dropping” allows you to drag and drop items onto the Start menu. I never found this very useful, but it certainly doesn’t hurt anything to have it checked.
The next five menu items are “Expand” options. If checked, these items will expand to reveal the submenu when you point at them on the Start menu to eliminate having the choices open in a separate window.
“Scroll Programs” allows the program selection menu to scroll up and down if the number of entries becomes too long for your screen real estate rather then expanding into a second column.
“Show Small Icons in Start Menu” is just what it says. Check it and get rid of those icons which are the size of country estates.
“Use Personalized Menus” rubbed me wrong from the beginning. In theory, it keeps the program menu clean by hiding programs which are used infrequently. What determines ‘infrequently’, I’m not sure, but if I have the program installed I want to see the icon without having to point to an arrow at the bottom of the menu. This option is showing up more frequently in numerous products and I make it a point to disable it wherever it’s encountered.
This completes step one by reclaiming the Classic Windows Start Menu. It may not be as flashy as the new XP offering, but it’s compact and provides solid access to needed items without burning the retinas.
Windows Classic Start Menu and Desktop Reclamation - Part II
Shown above is the standard desktop you see the first time Windows XP Professional loads. To open the “Display Properties” sheet, right click on any open part of the desktop and select “Properties”.
The sheet shown above will open with the five tabs displayed across the top. For the scope of this article, we will only be dealing with the “Themes” and “Desktop” tabs.

To see the theme choices available in XP, click the arrow on the drop down box and the sheet changes as shown below.
Click on the theme of your choice. In my case, it was the “Windows Classic” theme which is partially visible behind the drop down selection box.

Once your selection has been made, click on the “Desktop” tab to open the property sheet shown below.
[Bliss] is the default background for new XP professional installations. In the “Background” section, as shown below, select the background you prefer. In this case, I have selected the (None) option which displays the classic blue background.
Scroll down the list of possible backgrounds and you’ll come to one called “Windows XP” as shown below. Truthfully, I found this desktop rather pleasing and ended up using it rather than the solid blue desktop shown in the screen capture above. My one concession to the new XP interface.
Select [OK] to close the property sheet and enjoy the Windows Classic look of old.

What Is A Partition?


As you can probably guess by breaking down the word partition, it's a 'part' or section of the hard disk, although that's a bit misleading because 'part' tends to indicate that a partition is less than 100% of the drive. Although a partition 'can' be less than 100% of the space available on a drive it doesn't have to be less. As a matter of fact a hard drive can exist perfectly well on a system without any partition(s) on it whatsoever; it just won't be of any value for accessing and storing data. I think it's a bit more accurate to look at partitions as defining a certain area or amount of space on a hard drive, be it 1 or 100% of the drives total capacity.
Partition Types
Depending on type of system and what operating system is being used there are many different types of partitions, but since this site deals with XP it's most likely you'll be dealing with two types of partitions; Primary and Extended. Depending on who you ask, some people consider logical drives as another type of partition. To me, this is more a case of semantics than anything else, but I've included Logical Drives in this section.
Primary Partition - A partition that is used to start an operating system, although you can use primary partitions that don't contain the operating system. Look at the color coded key at the bottom of Fig. 01 and you'll see that Primary partitions are denoted by the dark blue color.
  • There can be up to a maximum of four primary partitions on a single basic disk.
  • The Primary partitions do not have to come before Extended partitions as shown on Disk 0.
  • A drive is not required to have any Primary partitions as shown by Disk 1
  • CD-ROM 1, while it does contain a blank CD, is not shown as containing a partition because there is no data contained on the CD.

Fig. 01
Extended Partition - A partition that can be sub-divided into logical drives. Look at the color coded key at the bottom of Fig. 01 and you'll see that Extended partitions are denoted by the dark green color.
  • An extended partition is not formatted or assigned a drive letter.
  • It's essentially a container for logical drives that are formatted and assigned drive letters. Disk 0 and 1 contain extended partitions that have a green band surrounding the logical drives (discussed below) that have been created in the extended partition.
Logical Drive - A logical drive is created within an extended partition. Look at the color coded key at the bottom of Fig. 01 and you'll see that Logical drives are denoted by the lighter, bright blue color.
  • An "unlimited" number of logical drives may be created in an extended partition, formatted and assigned drive letters. Unlimited is another misleading term used in conjunction with logical drives. The reality is you're limited by the number of available drive letters and the amount of hard drive space available for creating drives. In Fig. 01, Disk 1  has two logical drives, F and G,  identified by the bright blue color and contained within the extended partition. More Logical drives could be created in the Free Space until you either ran out of drive letters or the Free Space was exhausted.
  • Disk 1 and 2 also contain Unallocated space that isn't assigned to either a primary or extended partition. I'll deal with unallocated space later in the article.
System and Boot Partitions
This seems like as good a time as any for a brief discussion of System and Boot partitions. In almost every case where I've attempted to explain the difference between System and Boot partitions people have walked away shaking their heads because it just doesn't make any sense, but I'll give it another try. Here we go;
  • Whenever a computer system is started, either from a cold boot using the power switch or a warm boot such as restarting the system from within Windows, there are certain files needed to boot (start) the computer. These boot files reside on the System partition.
  • Once the boot files have been accessed and performed their function, the system files (the files that comprise the XP operating system) are accessed to complete the system start. The system files reside on the Boot partition.
If you just accept these two statements are true then everything will be fine. I know it makes no sense and seems to defy logic, but it's true.
The boot files reside on the System partition     ---   The system files reside on the Boot partition

Fig. 02
Look at Fig. 02 and you'll see C: is designated as the System partition. There is no designated Boot partition. In most cases this is the standard setup and there won't be a separate Boot partition designated.
Look at Fig. 03 and you'll see C: is designated as the System partition and I: is designated as the Boot partition. The boot files are located on partition C: and the system files (the XP operating system) are installed on the I partition.
Both screen captures are of the identical system so why does one have the Boot partition uniquely identified? The answer is because there are two operating systems installed on the same machine, or what is often called a dual boot setup. WindowsXP is installed on drive C: and Windows XP is also installed on drive I:. When the system is set to boot from the operating system installed on partition C: the system and boot files reside in the same partition so there is no need for a separate Boot partition designation. When the system is set to boot from the operating system installed on partition I: the system and boot files reside on different partitions so partition I is designated as the Boot partition.

Fig. 03
There is one more term that you may occasionally run across and that's Active partition. Any primary partition that has an operating system installed on it may be designated as the Active partition simply for the sake of convenience in making it the System partition. Active partition and System partition mean the same thing.

Partitioning Hard Drive During XP Installation


The assumption here is the partition scheme will be created on a hard drive using a bootable Windows XP CD. After booting from the CD and the initial setup files have loaded the screen in Fig. 01 will be displayed. If there is no existing operating system on the drive the space will be listed as Unpartitioned in the lower half of the screen. If there is an operating system installed, the existing partitions will be listed in the lower half of the screen. Selecting an existing partition and using the D key will delete it, along with any data and program files it contains. From this point there are a number of different partitioning possibilities.

If ENTER is pressed the entire unpartitioned space (in this case, 16379MB) will be used to create a C: partition. There will be no other options offered and the process will move forward to where you'll be asked to choose what file system will be used to format the partition.

Fig. 01
If the C key is pressed to create a partition in the unpartitioned space you will be taken to the screen shown in Fig. 02 where a custom size partition may be created. The minimum and maximum sizes allowed for the new partition are displayed for easy reference along with a line where the new partition size is entered. In this case I changed the default to 5000MB but any size may be entered that falls between the minimum and maximum allowed. Pressing Enter completes the creation process for that partition and returns you to the Fig. 01 screen.

Fig. 02
As you can see in Fig. 03 there is now a C: partition that is defined as Partition 1 and is 4997MB in size even though the size I entered in Fig. 02 was 5000MB. There's a reason why the sizes vary but it's outside the scope of this article so just accept that this is the way things work. If it's critical that you have a partition that's precisely sized, use the D key option to delete the partition then go in and try a slightly larger/smaller size than was entered previously. There's no guarantee you'll ever hit the partition size right on the nose but you should be able to get relatively close.

Fig. 03
If the partitioning process was stopped at this point, the newly created C: partition highlighted, the ENTER key selected and the installation of XP allowed to complete you would end up with a partitioning scheme as shown in Fig. 04 below. While this is a very elementary partitioning scheme it's not without some merit. The most important aspect of this scheme is that rather than committing the entire hard drive space to partition C:, it leaves the balance of the free space as Unallocated so it can be effectively divided up into additional Primary or Logical partitions after XP is installed.

Fig. 04
However, suppose you already have a partitioning scheme in mind that's a bit more extensive? Rather than merely having a C: partition you'd like to have additional partitions created. Simple enough. Refer back to Fig. 03 and rather than selecting the ENTER key, use the down arrow key to highlight the Unpartitioned Space entry and then press the C key. Once again you'll enter the size of the desired partition and hit Enter. Repeat the process as many times as needed until all the partitions have been created or you run out of Unallocated space. In Fig. 05 I have created two additional partitions (E: and F:) and there remains 4377MB of Unpartitioned Space that could be used for additional partitions.

Fig. 05
I stopped at this point, highlighted the newly created C: partition, selected the ENTER key and allowed the installation of XP to complete, ending up with a partitioning scheme as shown in Fig. 06 below. If you compare Fig. 04 with Fig. 06 you'll see some differences that are worth noting.
  • There is no difference between the C: partitions. Both are 4.88 GB, NTFS Primary partitions designated as System.
  • Once the first partition has been created, in this case C:, subsequent partitions created will be placed within an Extended partition and created as Logical drives. In the screen capture below they are identified by the brighter blue color and assigned drive letters E: and F:. You have no control over the drive letter assignment nor the fact the partitions will be logical drives.
  • Once an Extended partition has been created any Unpartitioned space left on the drive will no longer be left as Unallocated as in Fig. 04 above, but will now be identified as Free Space and contained within the Extended partition. Again, you have no option available to modify this default behavior.

Fig. 06
Advantages and Disadvantages of Partitioning Method
Advantages
  • Quick
  • Simple to use and understand
  • Uses the built in partitioning utility supplied with Windows XP
Disadvantages
  • Only available when installing from the CD or a network location.
  • Lack of advanced control features for creating anything other than very elementary partition schemes.

wikipedia

Wikipedia is a free, web-based, collaborative, multilingual encyclopedia project supported by the non-profit Wikimedia Foundation. .. you can surf Wikipedia by going to this link
http://en.wikipedia.org/wiki/Main_Page

About Your Hardware-Hardware Information

Learning About Your Hardware with Windows

If your computer is already running Windows 9x, you can use the following steps to get additional configuration information:
Figure 2-1. Windows 9x System Properties
  • In Windows, click on the My Computer icon using the secondary (normally the right) mouse button. A pop-up menu should appear.
  • Select Properties. The System Properties window should appear. Note the information listed under Computer — in particular the amount of RAM listed.
  • Click on the Device Manager tab. You will then see a graphical representation of your computer's hardware configuration. Make sure the View devices by type radio button is selected.
At this point, you can either double-click on the icons or single-click on the plus sign + to look at each entry in more detail. Look under the following icons for more information:
Figure 2-2. Windows 9x System Properties
  • Disk drives — the type (IDE or SCSI) of hard drive will be found here. (IDE drives will normally include the word "IDE," while SCSI drives will not.)
  • Hard disk controllers — information about your hard drive controller.
  • CDROM — information about any CD-ROM drives connected to your computer.
    NoteNote
     
    In some cases, there may be no CD-ROM icon, yet your computer has a functioning CD-ROM drive. This is normal, depending on how Windows was originally installed. In this case, you may be able to learn additional information by looking at the CD-ROM driver loaded in your computer's config.sys file.
  • Mouse — the type of mouse present on your computer.
  • Display adapters — if you are interested in running the X Window System, you should write down the information you find here.
  • Sound, video and game controllers — if your computer has sound capabilities, you will find more information about them here.
  • Network adapters — information on your computer's network card (if you have one).
  • SCSI controllers — if your computer uses SCSI peripherals, you will find additional information on the SCSI controller here.
This method is not a complete substitute for opening your computer's case and physically examining each component. However, in many cases it can provide sufficient information to continue with the installation.
NoteNote
 
This information can also be printed by clicking on the Print button. A second window will appear, allowing you to choose the printer, as well as the type of report. The All Devices and System Summary report type is the most complete.
If your computer is already running Windows 2000, you can use the following steps to get additional configuration information:
Figure 2-3. Windows 2000 System Properties
  • In Windows, click on the My Computer icon using the secondary (normally the right) mouse button. A pop-up menu should appear.
  • Select Properties. The System Properties window should appear. Note the information listed under Computer — in particular the amount of RAM listed.
  • Click on the Hardware tab. You will then see your computer's hardware configuration options.
    Figure 2-4. Windows 2000 System Properties — Hardware
  • Click on the Device Manager button. You will then see a graphical representation of your computer's hardware configuration. Make sure the View devices by type radio button is selected.
At this point, you can either double-click on the icons or single-click on the plus sign + to look at each entry in more detail. Look under the following icons for more information:
Figure 2-5. Windows 2000 System Properties
  • Disk drives — the type (IDE or SCSI) of hard drive will be found here. (IDE drives will normally include the word "IDE," while SCSI drives will not.)
  • Hard disk controllers — information about your hard drive controller.
  • CDROM — information about any CD-ROM drives connected to your computer.
  • Mouse — the type of mouse present on your computer.
  • Display adapters — if you are interested in running the X Window System, you should write down the information you find here.
  • Sound, video and game controllers — if your computer has sound capabilities, you will find more information about them here.
  • Network adapters — information on your computer's network card (if you have one).
  • SCSI controllers — if your computer uses SCSI peripherals, you will find additional information on the SCSI controller here.
This method is not a complete substitute for opening your computer's case and physically examining each component. However, in many cases it can provide sufficient information to continue with the installation.

Installing Fedora 10-Step by Step Guide

Fedora 10, also known as Cambridge, was released on November 25th, 2008, and it brings GNOME 2.24 and KDE 4.1, faster boot experience with Plymouth, better printing, better webcam support, improved wireless network connection sharing, better software maintenance and update (powered by PackageKit and RPM 4.6), and virtualization storage. Plus, it adds a new security tool for IDS (Intrusion Detection System) called SecTool.
The following tutorial will teach you how to install the DVD edition of the Fedora 10 operating system on your PC. Why the DVD edition? Because we believe it offers most of the applications you'll need. For those of you that don't have a fast Internet connection, we recommend using one of the Live GNOME or KDE4 editions. However, this guide will make things very simple for you, but if you get stuck somewhere in the middle of the installation and you need help, do not hesitate to use our commenting system at the end of the article.


What do I need to get started?

· You will need the Fedora 10 DVD image that corresponds to your hardware architecture (i386 or amd64), and which can be downloaded from here. When the download is over, burn the ISO image with your favorite CD/DVD burning application (Brasero on Linux or Nero, CDBurnerXP, Roxio on Windows) on a blank DVD at 4x speed.
· We, here at the Softpedia Labs, always recommend having an empty hard drive for a Linux installation (that means no other operating system on it, no Windows), and you must have a minimum of 10 GB free space for the Fedora installation.

Great, now let's begin. Insert or leave the DVD in your CD/DVD-ROM device, and reboot the computer in order to boot from the DVD. Hit the F8 or F12 key (depending on your BIOS) to select the CD/DVD-ROM as the boot device.

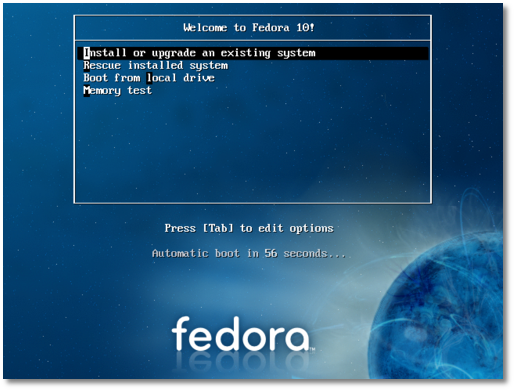
You'll be presented with a very nice Fedora artwork GRUB splash and some options...
Review image


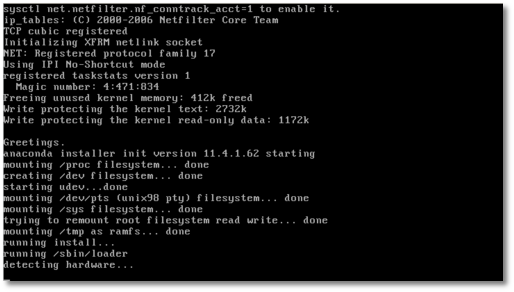
At this stage, we simply suggest you press Enter, and wait for the system to load...

Review image


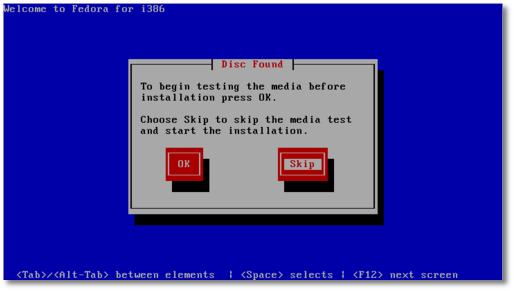
Select the "Skip" option when you're asked if you want to check the media before installation, and press "Enter"...

Review image


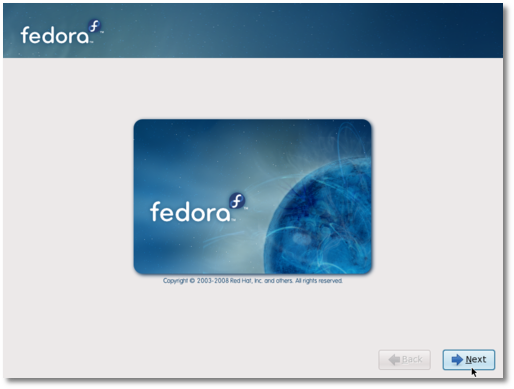
Anaconda (the Fedora installer) will load and you'll see the welcome screen. Click "Next"...

Review image


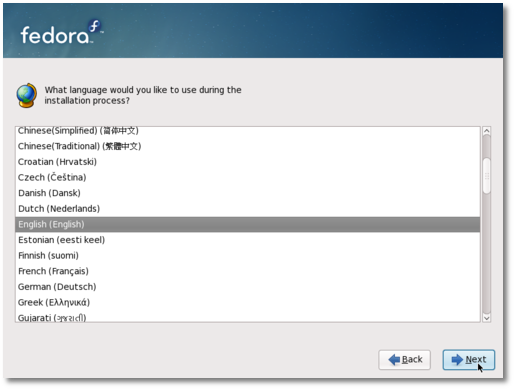
Choose your language...

Review image


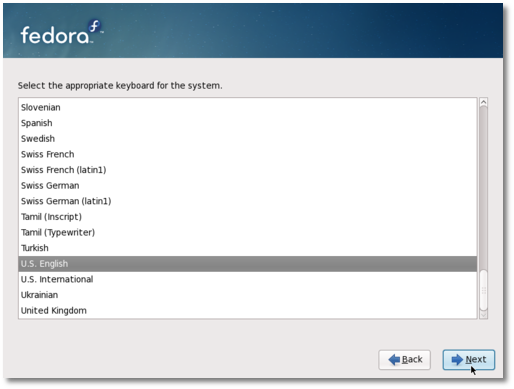
Choose your keyboard layout...

Review image


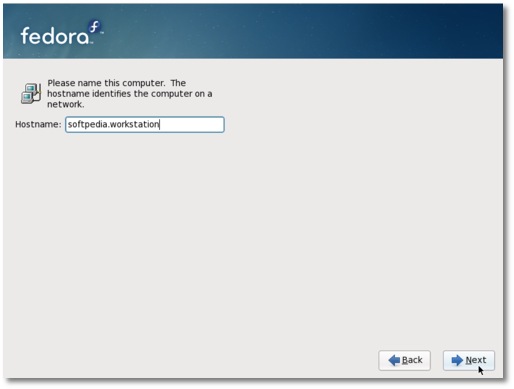
Type a name for the computer. It can be anything you want...

Review image


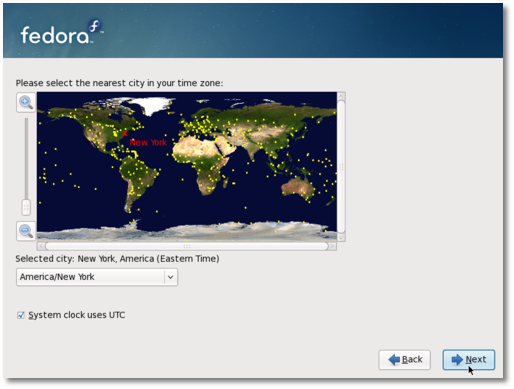
Select your location (country/city)...

Review image


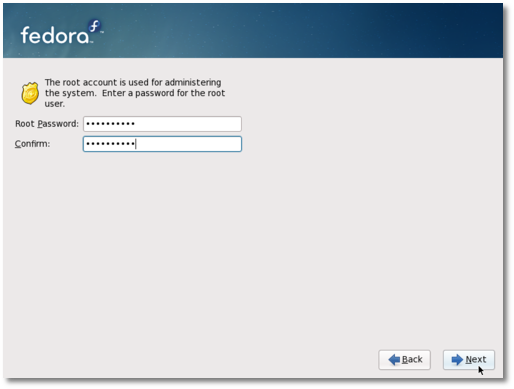
Enter the root (System Administrator) password. The longer, the better (WRITE IT SOMEWHERE)...

Review image


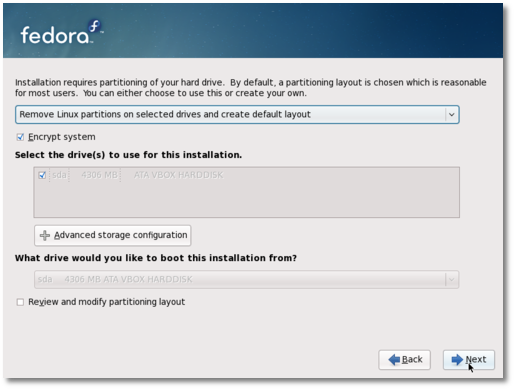
Here comes the partitioning part! If you have an empty hard drive, all you have to do is click "Next," but make sure the"Remove all partitions on selected drives and create default layout" option is selected. If you don't have an empty hard drive and you still want to install Fedora 10 on your machine, then make sure you select the "Use free space on the selected drives and create default layout" option (10 GB minimum of free space is required). Click "Next"...

Review image


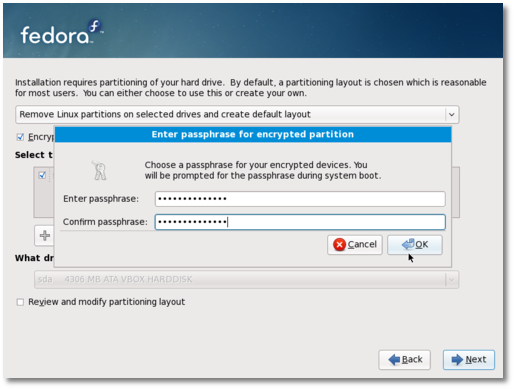
We also recommend to select the "Encrypt system" option. Enter a password (the longer, the better) for the encrypted partition...

Review image


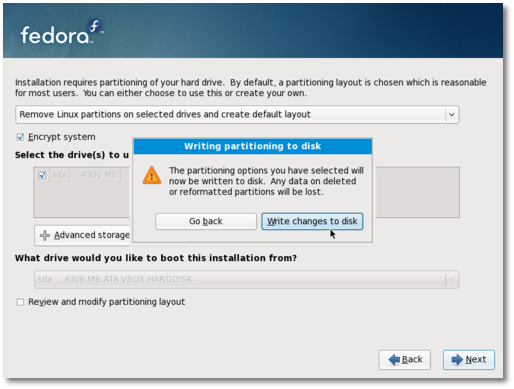
Click the "Write changes to disk" button when asked...

Review image


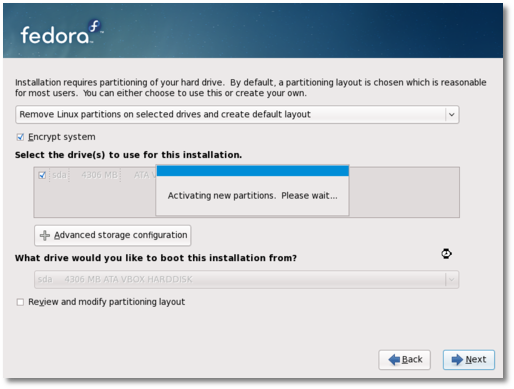
The hard drive will be formatted and the partitions will be created...

Review image


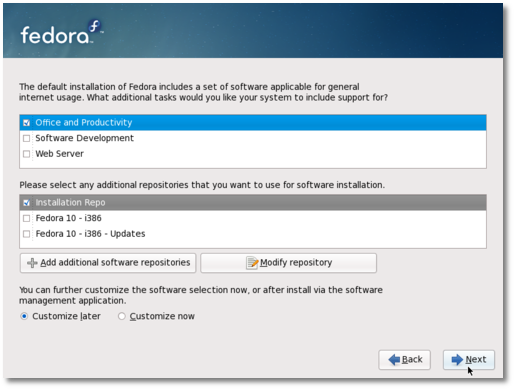
Now, you can select the desired packages...

Review image


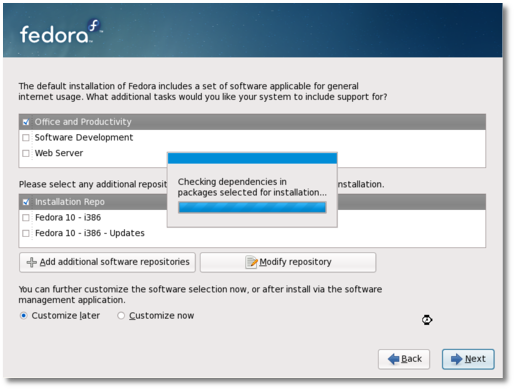
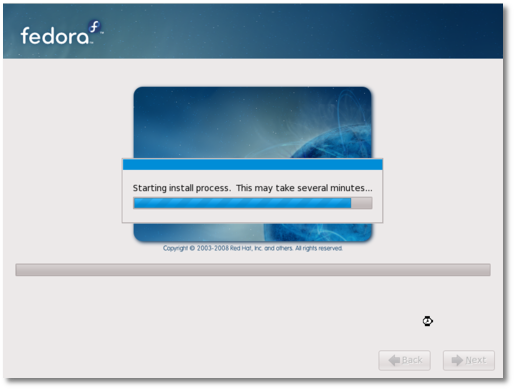
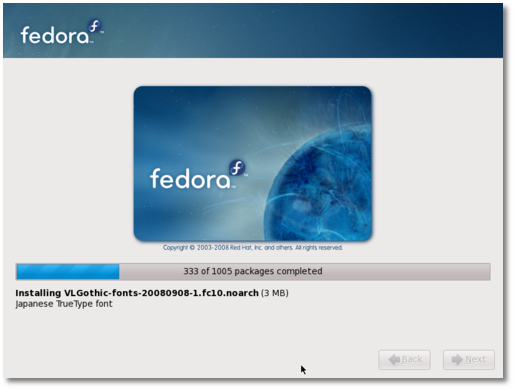
Hit the "Next" button and everything will be done automatically from now on, just sit back and watch how the packages are copied to your hard drive, or you can read the latest news while enjoying a cup of coffee. The installation process will take about 8-10 minutes (depending on your computer specs and the selected packages).

Review image


Review image


Review image


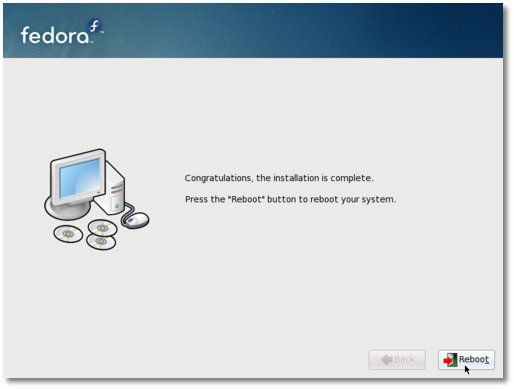
When the installation is over, you will get a "Congratulations, the installation is complete" screen. Click the "Reboot" button and your computer will automatically restart...

Review image


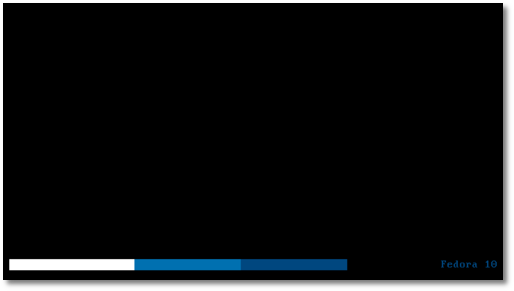
Remove the DVD from your optical drive. Your brand new Fedora 10 operating system will boot for the first time...

Review image


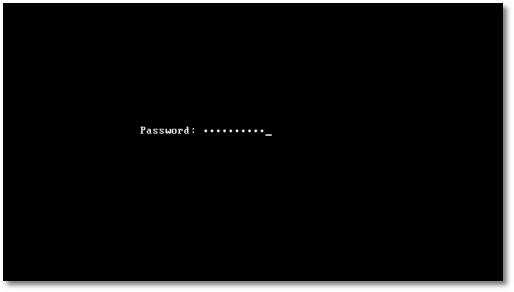
If you've chosen to encrypt your partition, then you'll be prompted for the passphrase...

Review image


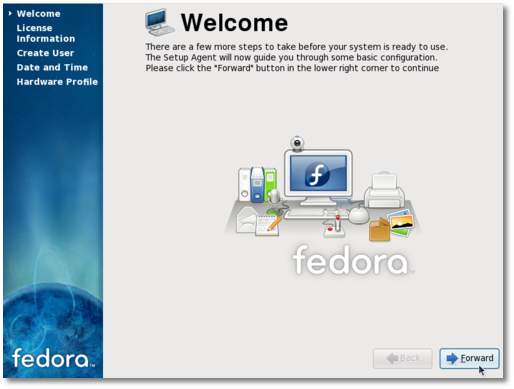
The system will continue to boot and in a few seconds you will see the First Boot Configuration Wizard. Click "Forward" on the Welcome screen...

Review image


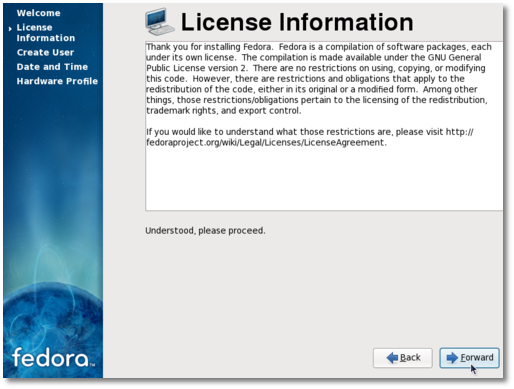
Click "Forward" on the License screen...

Review image


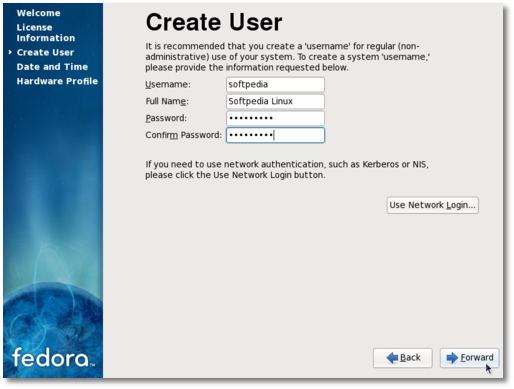
Create a regular user for the system...

Review image


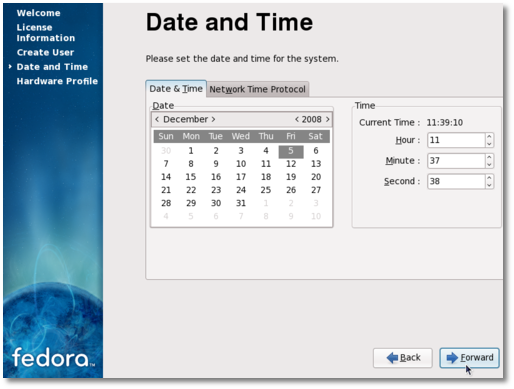
Set the date and time...

Review image


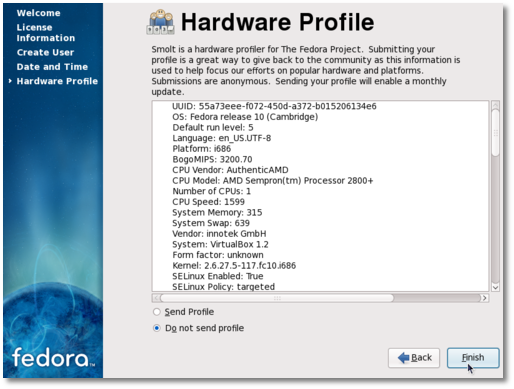
Send your hardware profile to the Fedora Project (optional)...

Review image


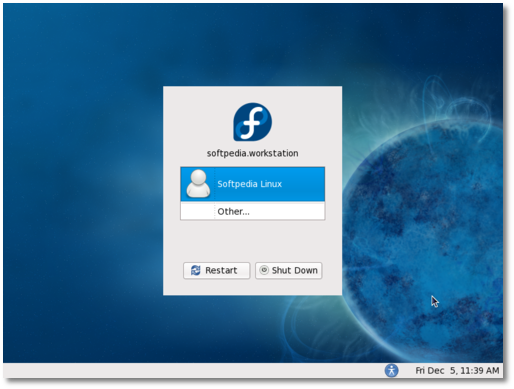
Click "Finish" and you will see the login screen. Enter the password for the regular user you've just created...

Review image


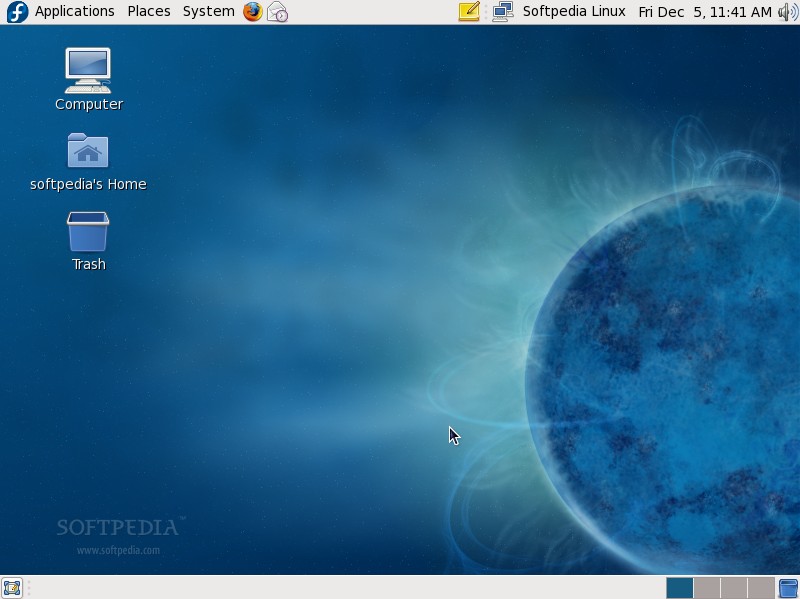
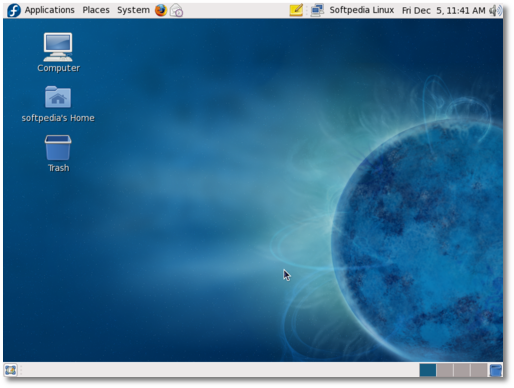
That's it! Enjoy the ultimate and breathtaking Fedora 10 Linux distribution!

Review image


IT Charger Headline Animator